AI Foundry is in beta. We are actively shaping the product, so things may change as we iterate. Your feedback is welcome.
Customer Support Playbook
This tutorial walks you through the complete workflow for assembling a multi-step agentic pipeline in AI Foundry. You will create every resource from scratch — a Model, a Skill, a Spec Template, an Agent, and finally a Playbook — and then validate the result in the AI Playground.
What you will build
A two-agent customer support pipeline:
- Triage Agent — reads the incoming customer message and classifies its intent and urgency.
- Response Agent — uses the classification produced by the Triage Agent to draft a polished reply following your company tone-of-voice guidelines.
The two agents are connected sequentially inside a Playbook and share a common Skill (tone-of-voice guidelines) and a Spec Template (the reply format specification).
Prerequisites
- Access to an AI Foundry instance.
- A Google Cloud project with Vertex AI enabled and credentials configured (Google Vertex AI is used in the examples below, but any supported provider works).
Step 1: Create a Model
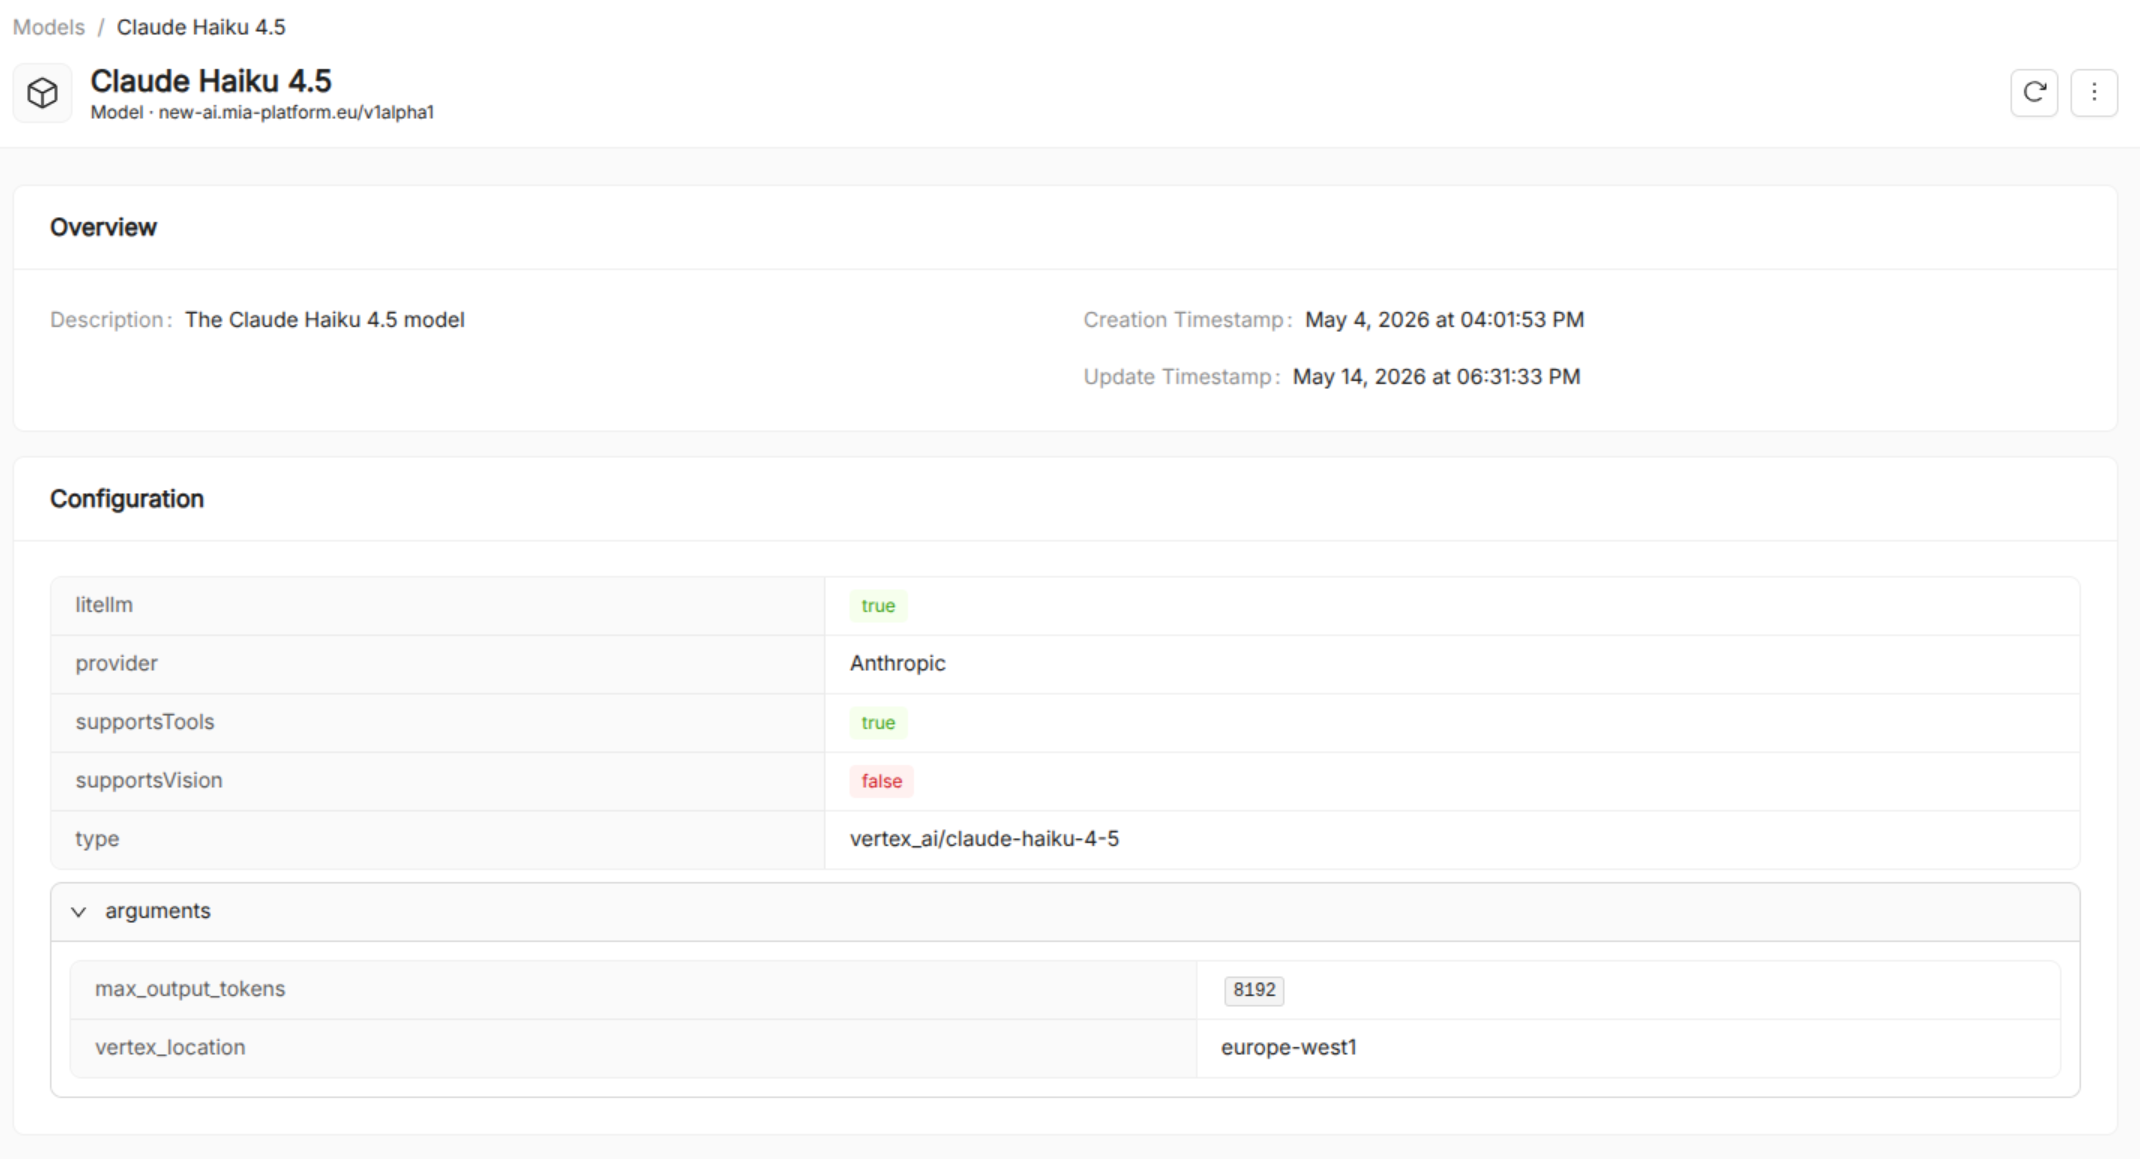
A Model stores the LLM provider configuration that agents will reference. You only need to do this once per provider/model combination.
-
Open AI Foundry and go to
Integration>Modelsin the left navigation menu. -
Click New Model.
-
Fill in the form:
Field Example value Title Claude Haiku 4.5 Name claude-haiku-4-5Description The Claude Haiku 4.5 model Type vertex_ai/claude-haiku-4-5Provider AnthropicSupports Tools ✔ enabled LiteLLM ✔ enabled Arguments {"max_output_tokens": 8192, "vertex_location": "europe-west1" } -
Click OK.
The model now appears in the Models list and is selectable when creating an Agent.
Step 2: Create a Skill
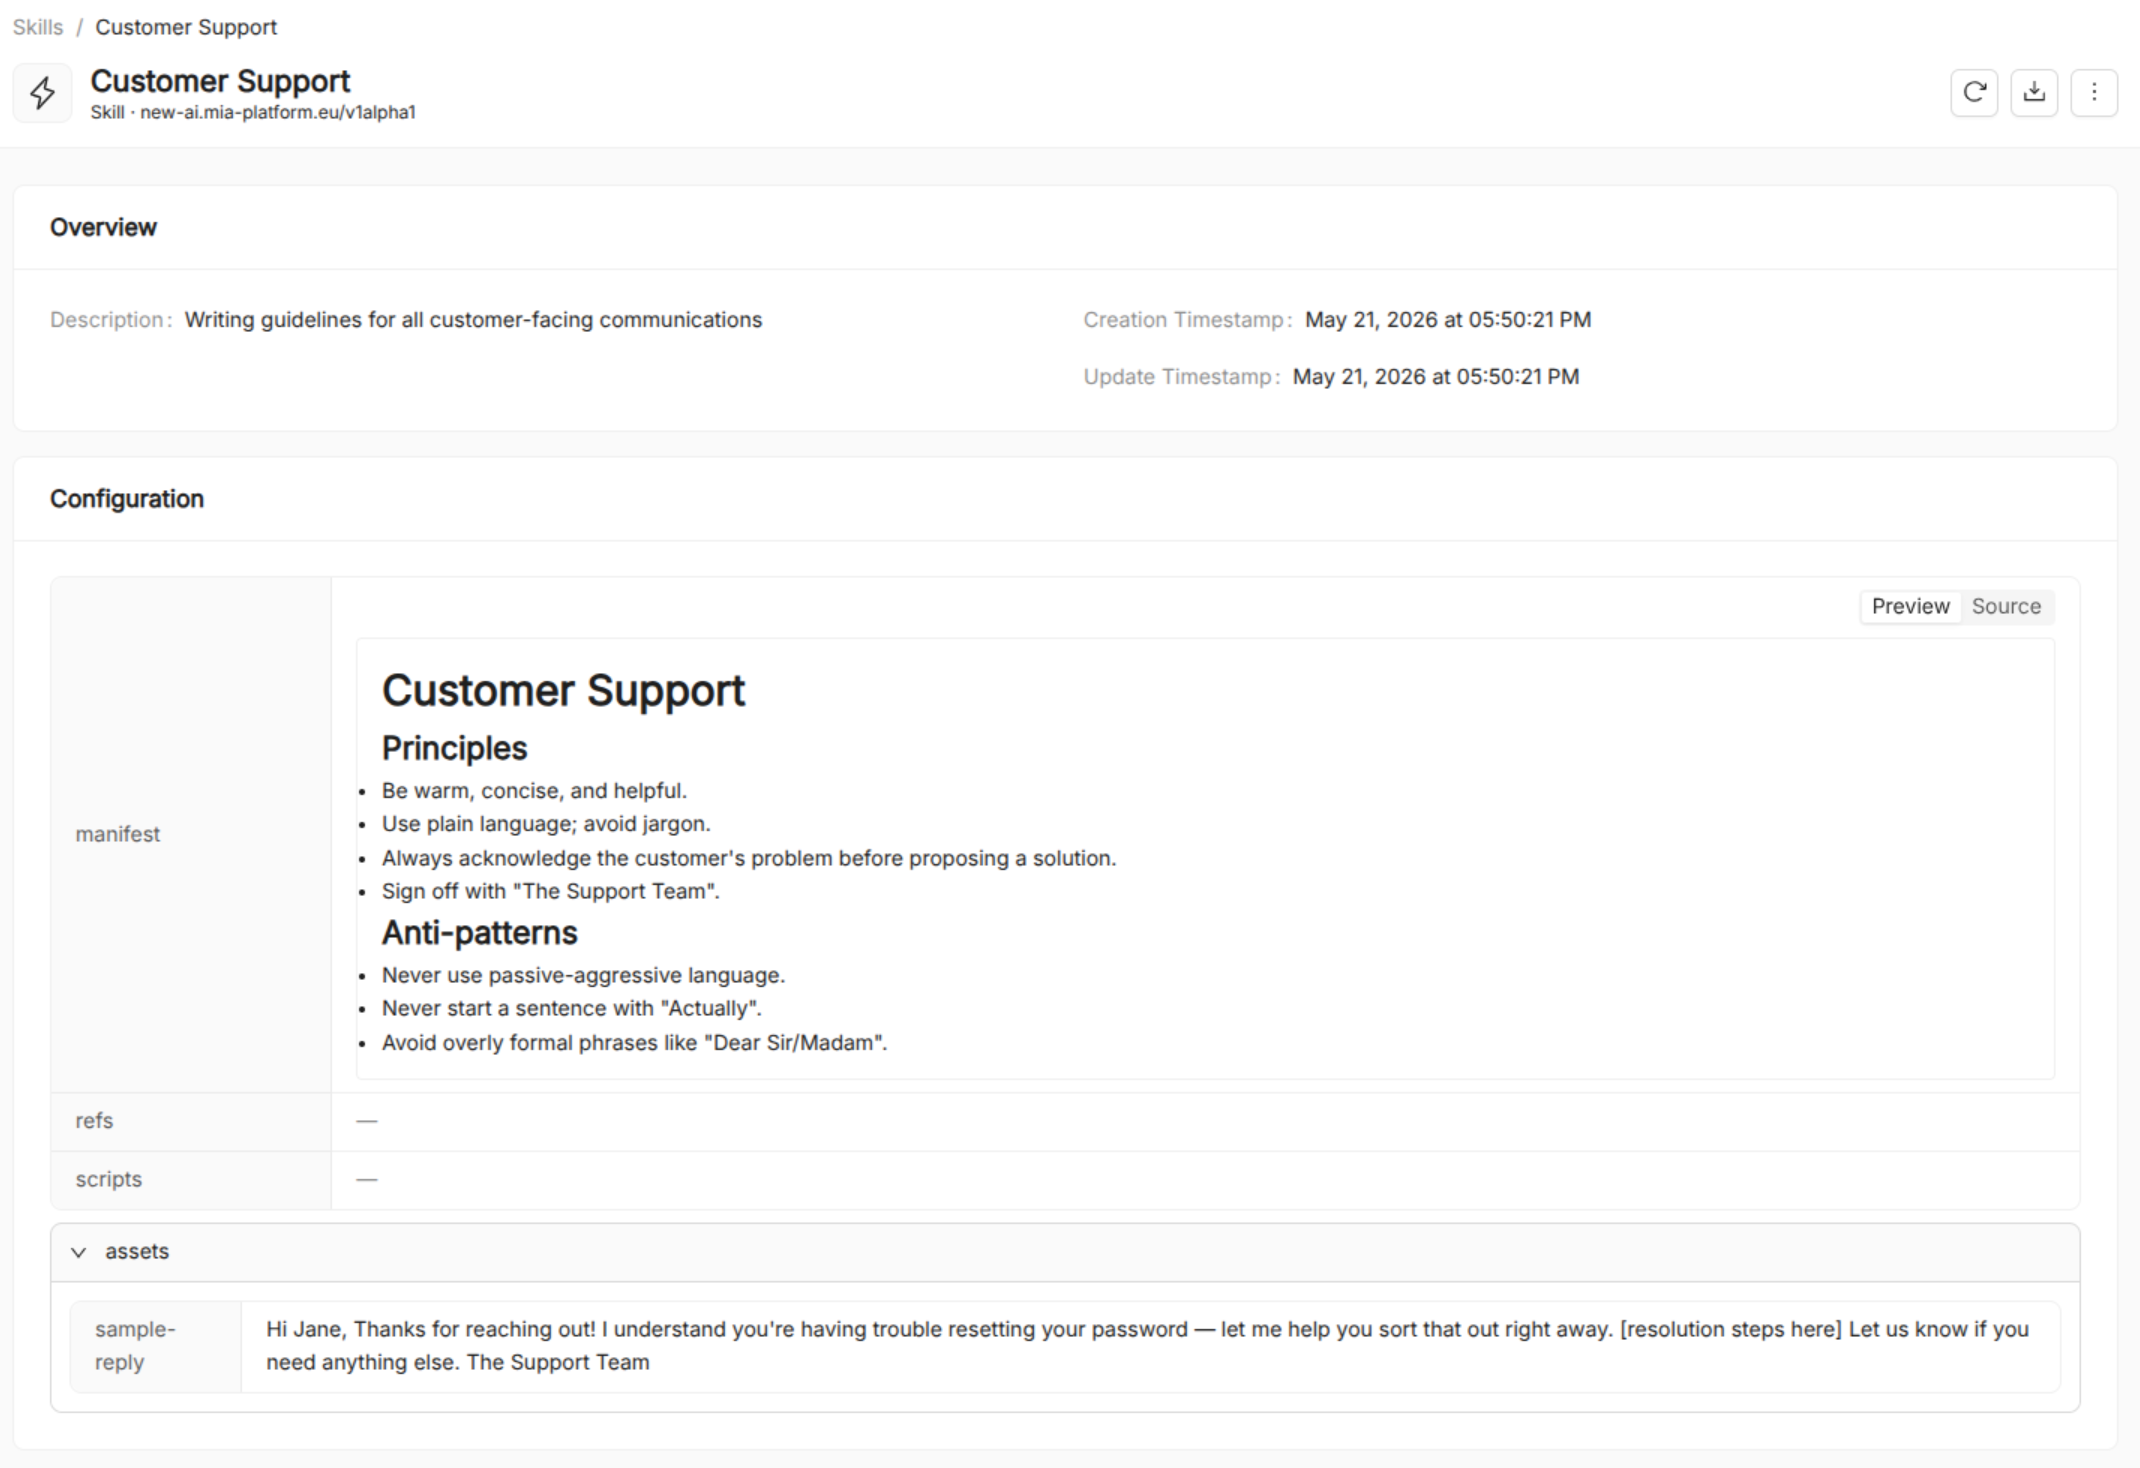
A Skill is a reusable capability bundle. Here you will create a skill that codifies your company's tone-of-voice rules so that any agent can follow them without duplicating the guidelines.
-
Go to
Integration>Skillsin the left navigation. -
Click New Skill.
-
Fill in the form:
Field Value Title Customer Support Name customer-supportDescription Writing guidelines for all customer-facing communications -
In the Manifest editor, write the skill documentation. For example:
# Customer Support## Principles- Be warm, concise, and helpful.- Use plain language; avoid jargon.- Always acknowledge the customer's problem before proposing a solution.- Sign off with "The Support Team".## Anti-patterns- Never use passive-aggressive language.- Never start a sentence with "Actually".- Avoid overly formal phrases like "Dear Sir/Madam". -
Optionally add an Asset named
example-replywith a sample response to reinforce the guidelines:Hi Jane,Thanks for reaching out! I understand you're having trouble resetting your password — let me help you sort that out right away.[resolution steps here]Let us know if you need anything else.The Support Team -
Click Create Skill.
Step 3: Create a Spec Template
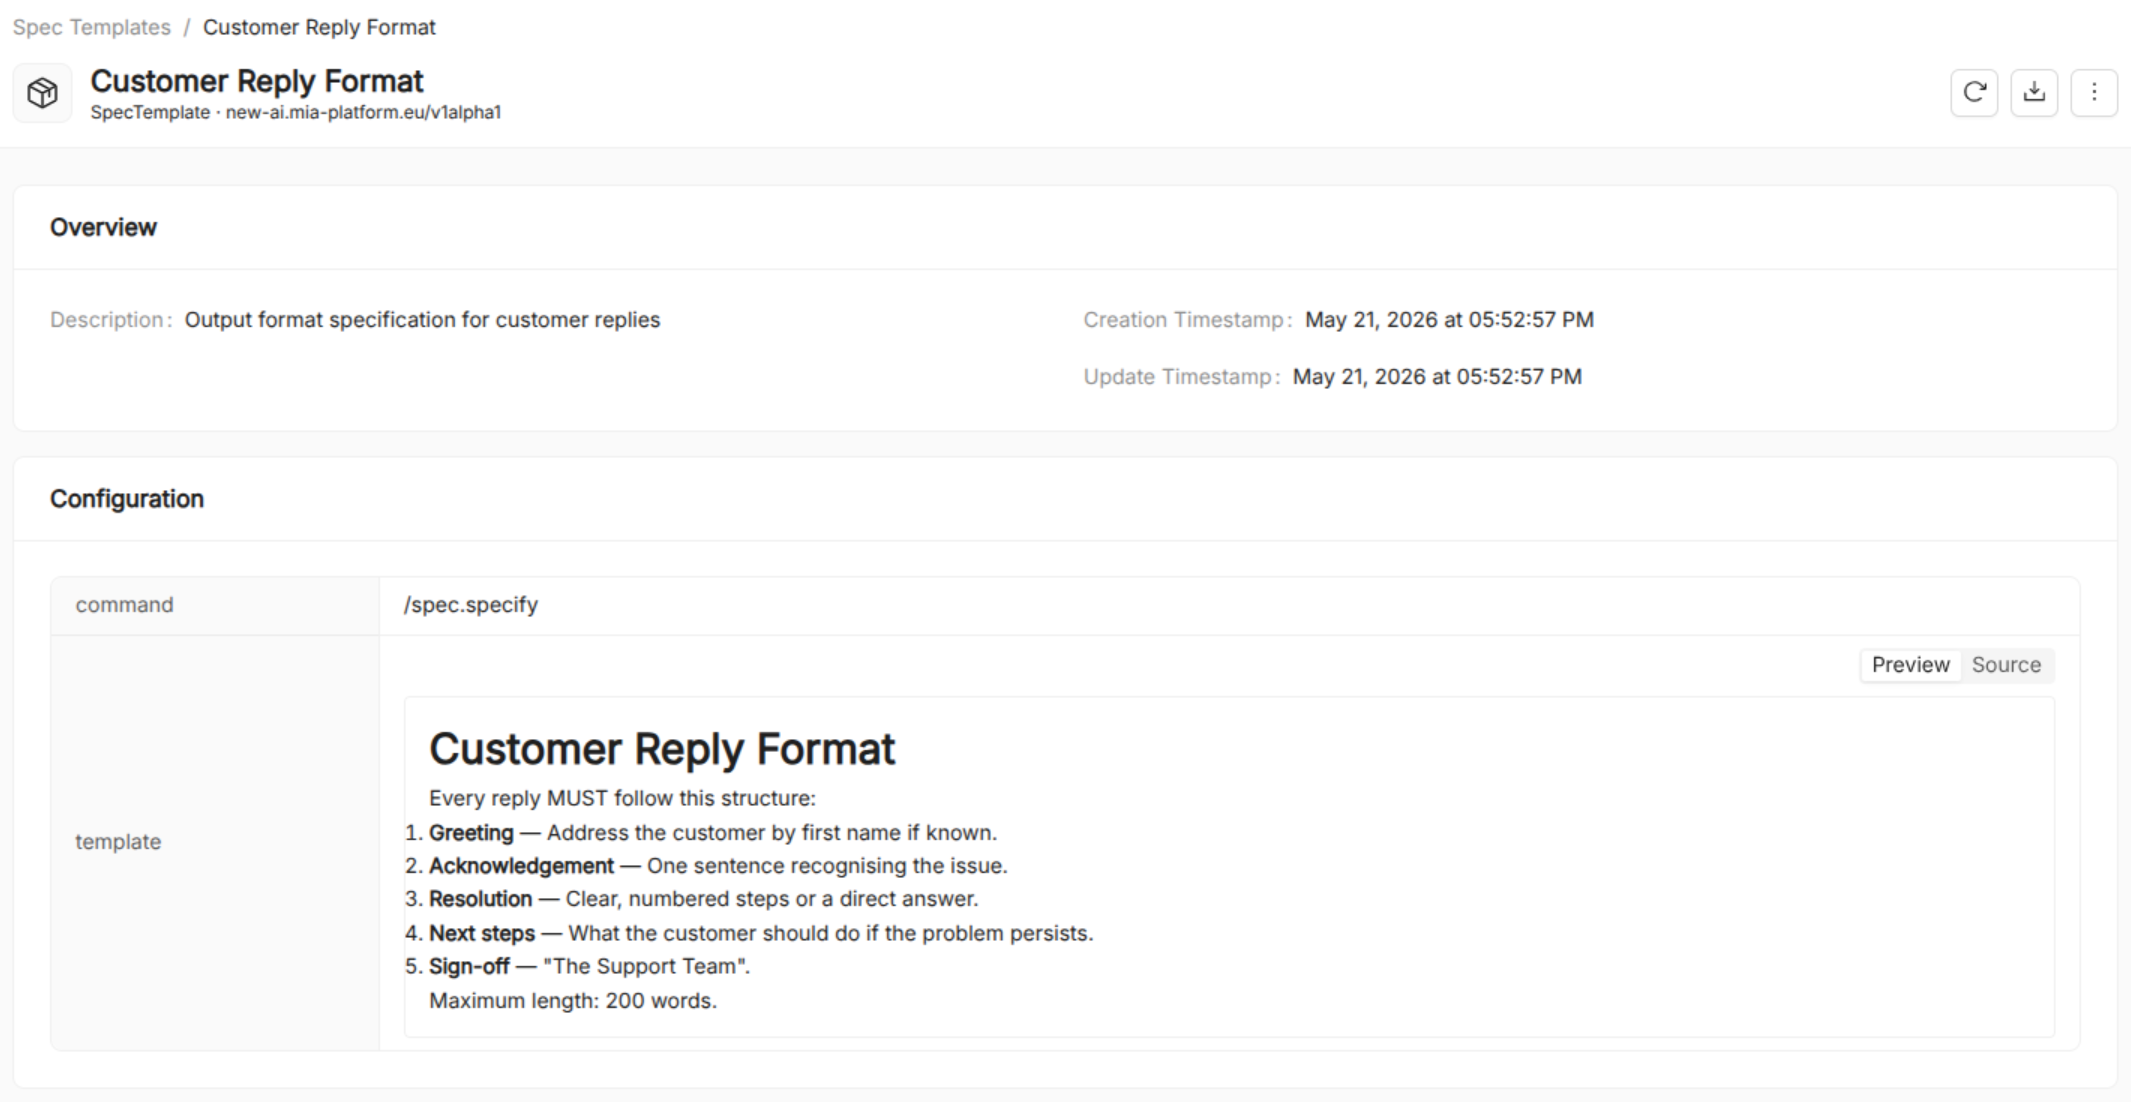
A Spec Template supplies a structured document that agents can reference during execution. Here you will define the schema that the Response Agent must use when drafting a reply.
-
Go to
Content>Spec Templatesin the left navigation. -
Click New Spec Template.
-
Fill in the form:
Field Value Title Customer Reply Format Name customer-reply-formatDescription Output format specification for customer replies Command /spec.specify -
In the Template editor, write the reply schema:
# Customer Reply FormatEvery reply MUST follow this structure:1. **Greeting** — Address the customer by first name if known.2. **Acknowledgement** — One sentence recognising the issue.3. **Resolution** — Clear, numbered steps or a direct answer.4. **Next steps** — What the customer should do if the problem persists.5. **Sign-off** — "The Support Team".Maximum length: 200 words. -
Click Create Spec Template.
Step 4: Create the Agents
You need two agents for this pipeline. Create them one at a time.
4a — Triage Agent
-
Go to
Orchestration>Agentsand click New Agent. -
Fill in the form:
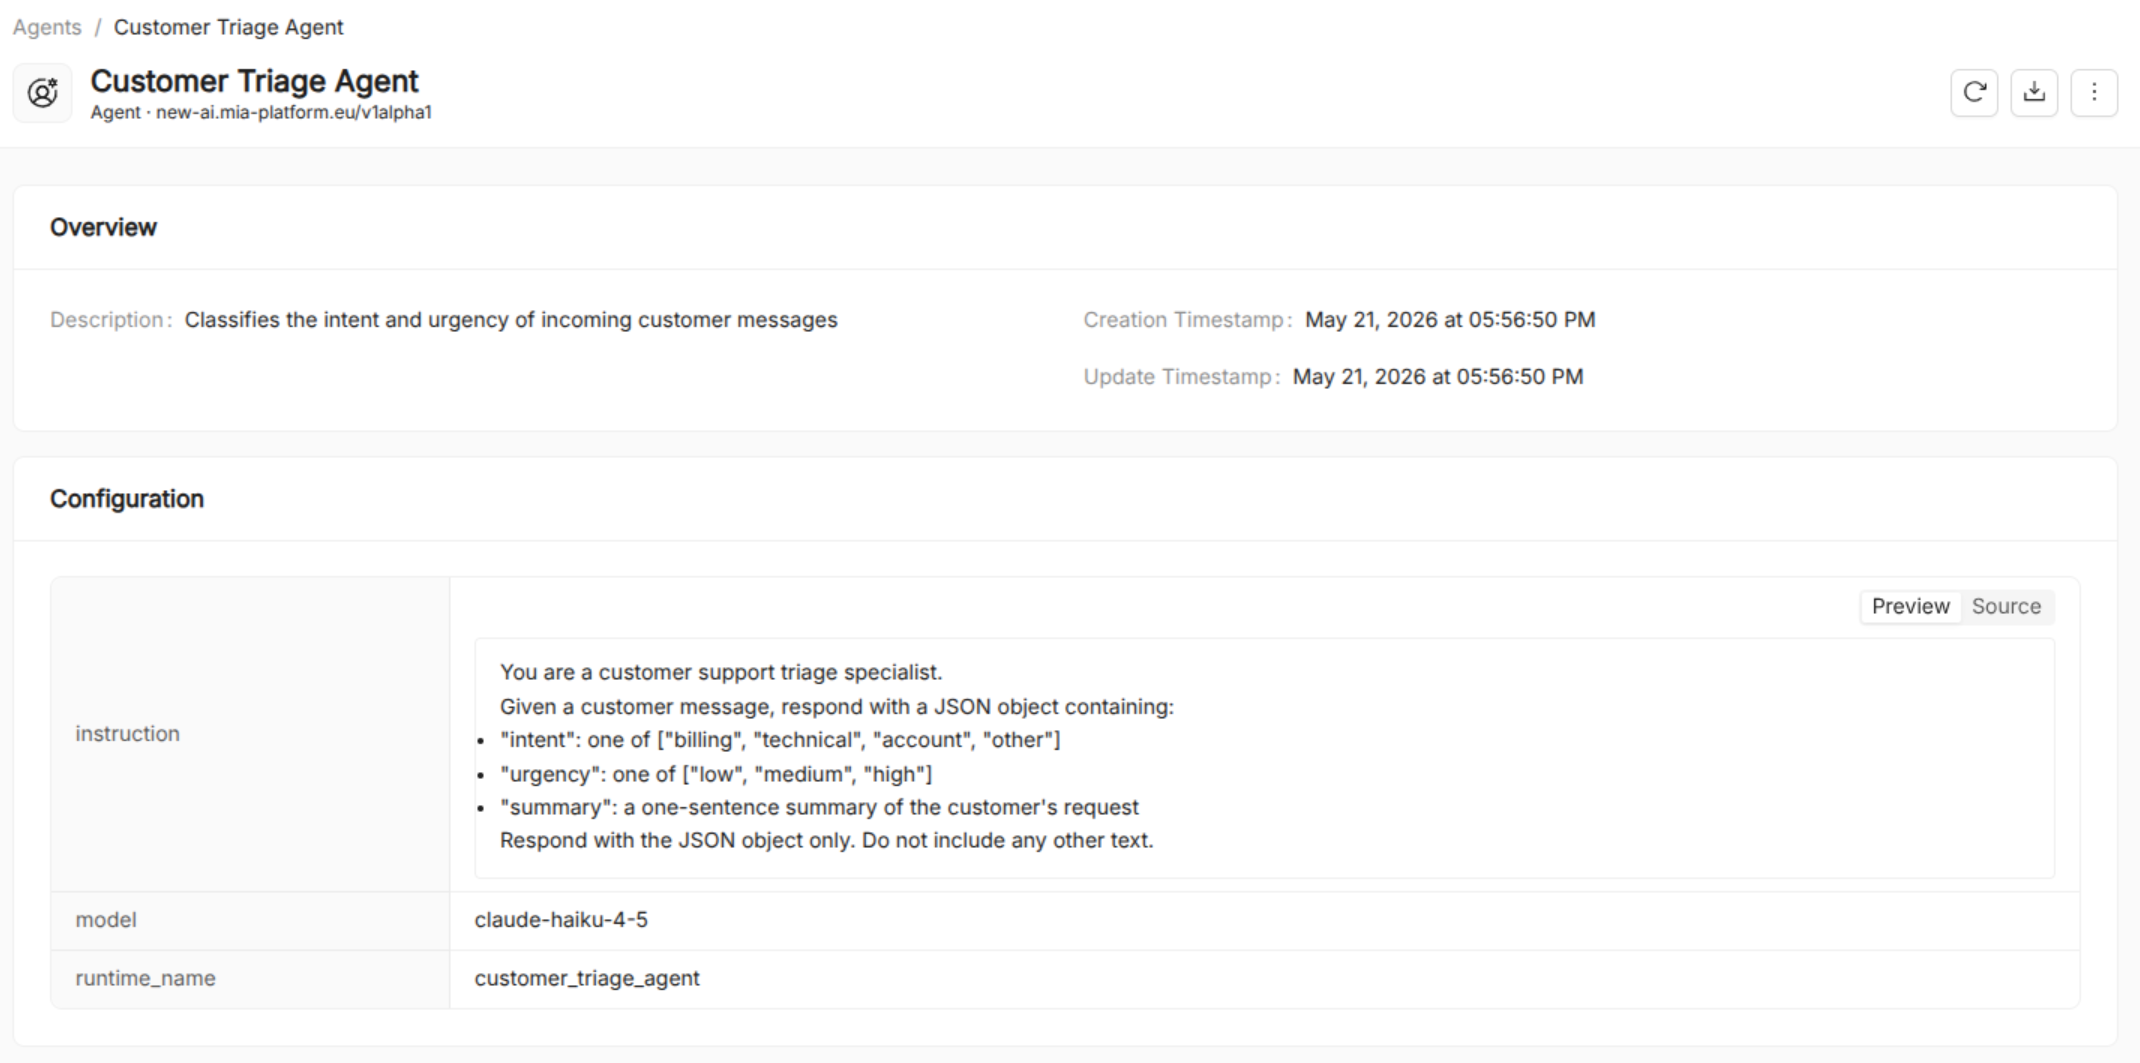
Field Value Title Customer Triage Agent Name customer-triage-agentRuntime Name customer-triage-agentDescription Classifies the intent and urgency of incoming customer messages Model Claude Haiku 4.5(the model created in Step 1) -
Write the Instruction (system prompt):
You are a customer support triage specialist.Given a customer message, respond with a JSON object containing:- "intent": one of ["billing", "technical", "account", "other"]- "urgency": one of ["low", "medium", "high"]- "summary": a one-sentence summary of the customer's requestRespond with the JSON object only. Do not include any other text. -
Leave Tools empty (this agent does not need external tools).
-
Leave Skills empty (classification is self-contained).
-
Click Create Agent.
4b — Response Agent
-
Click New Agent again.
-
Fill in the form:
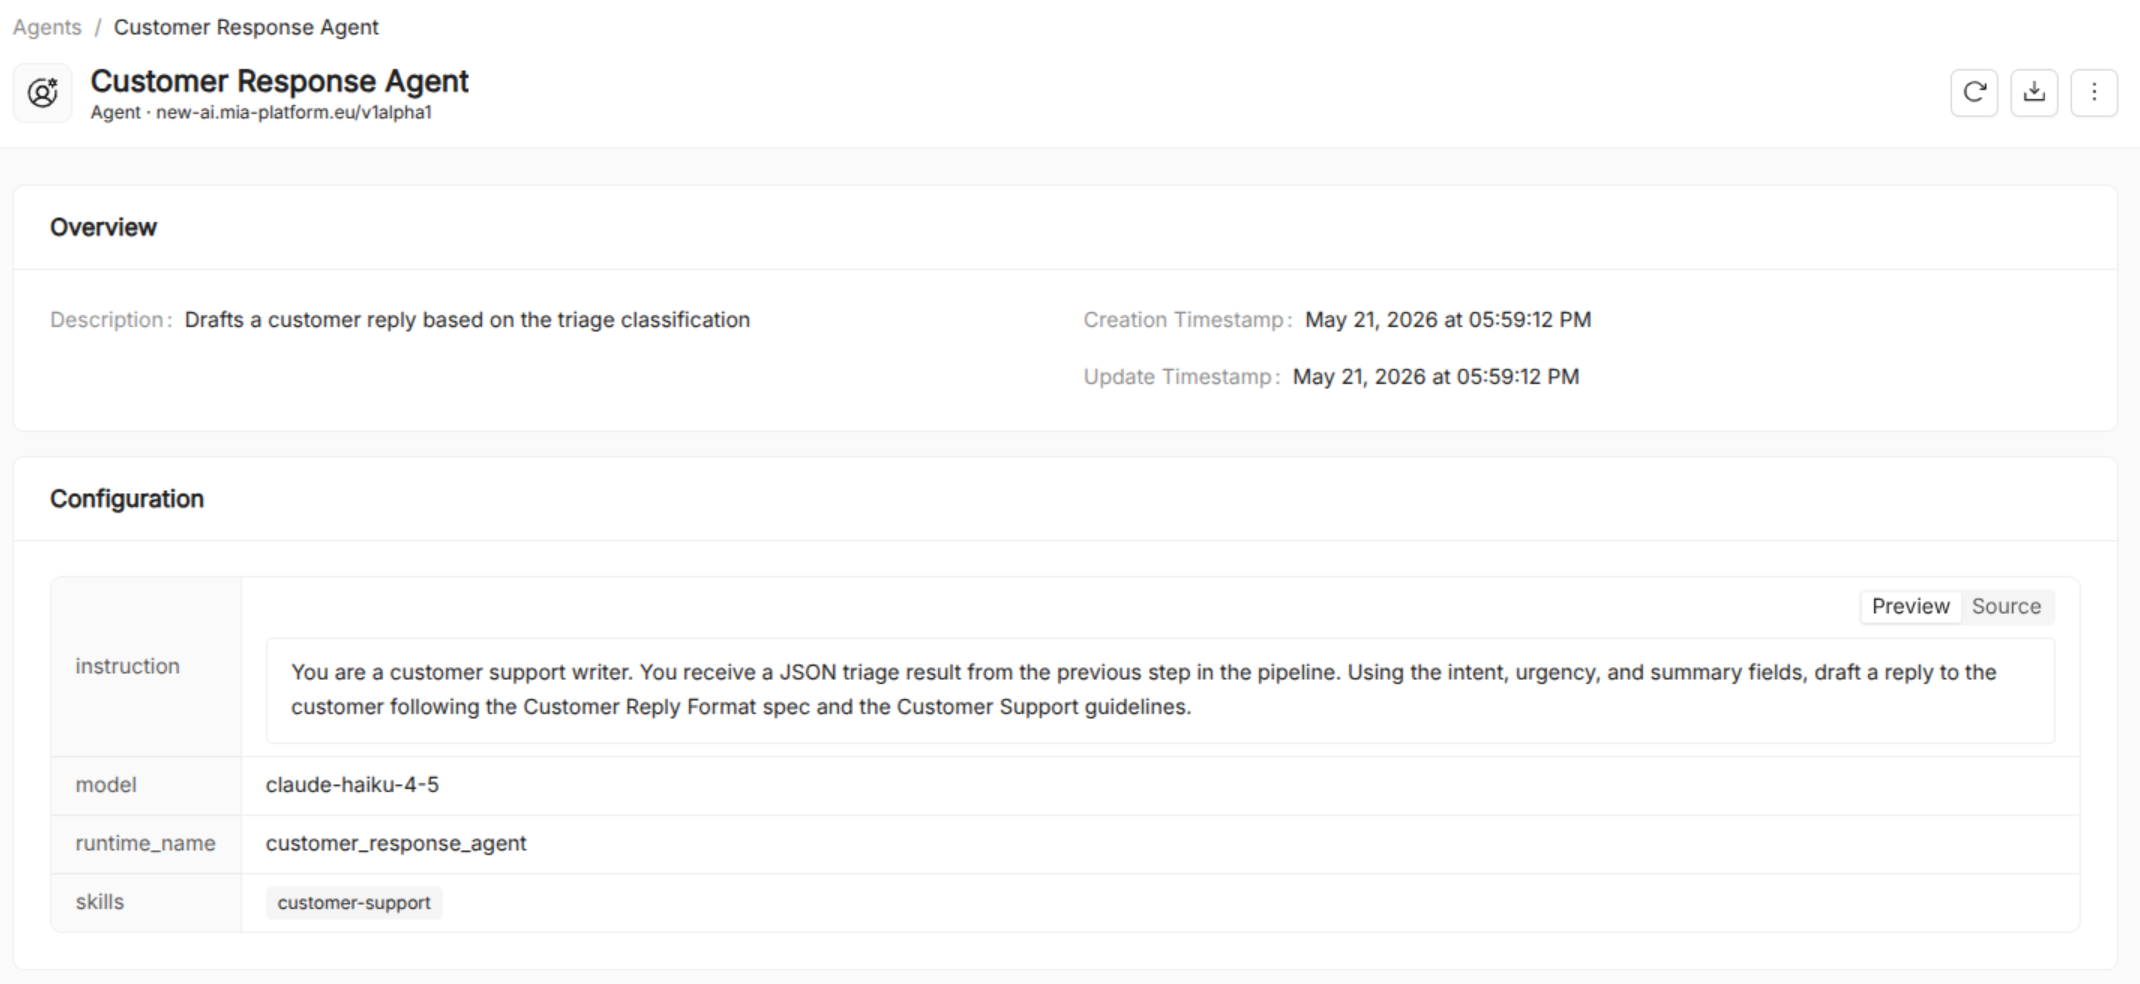
Field Value Title Customer Response Agent Name customer-response-agentRuntime Name customer-response-agentDescription Drafts a customer reply based on the triage classification Model Claude Haiku 4.5 -
Write the Instruction:
You are a customer support writer.You receive a JSON triage result from the previous step in the pipeline.Using the intent, urgency, and summary fields, draft a reply to the customerfollowing the Customer Reply Format spec and the Customer Support guidelines. -
Under Skills, select
Customer Support. -
Click Create Agent.
Step 5: Create the Playbook
Now you will wire the two agents together into a sequential pipeline using the Playbook Builder.
-
Go to
Orchestration>Playbooksand click New Playbook. -
The builder opens on the Overview step:
Field Value Title Customer Support Pipeline Name customer-support-pipelineDescription Triages a customer message and drafts a polished reply -
Click Next to proceed to the Agentic Flow step.
-
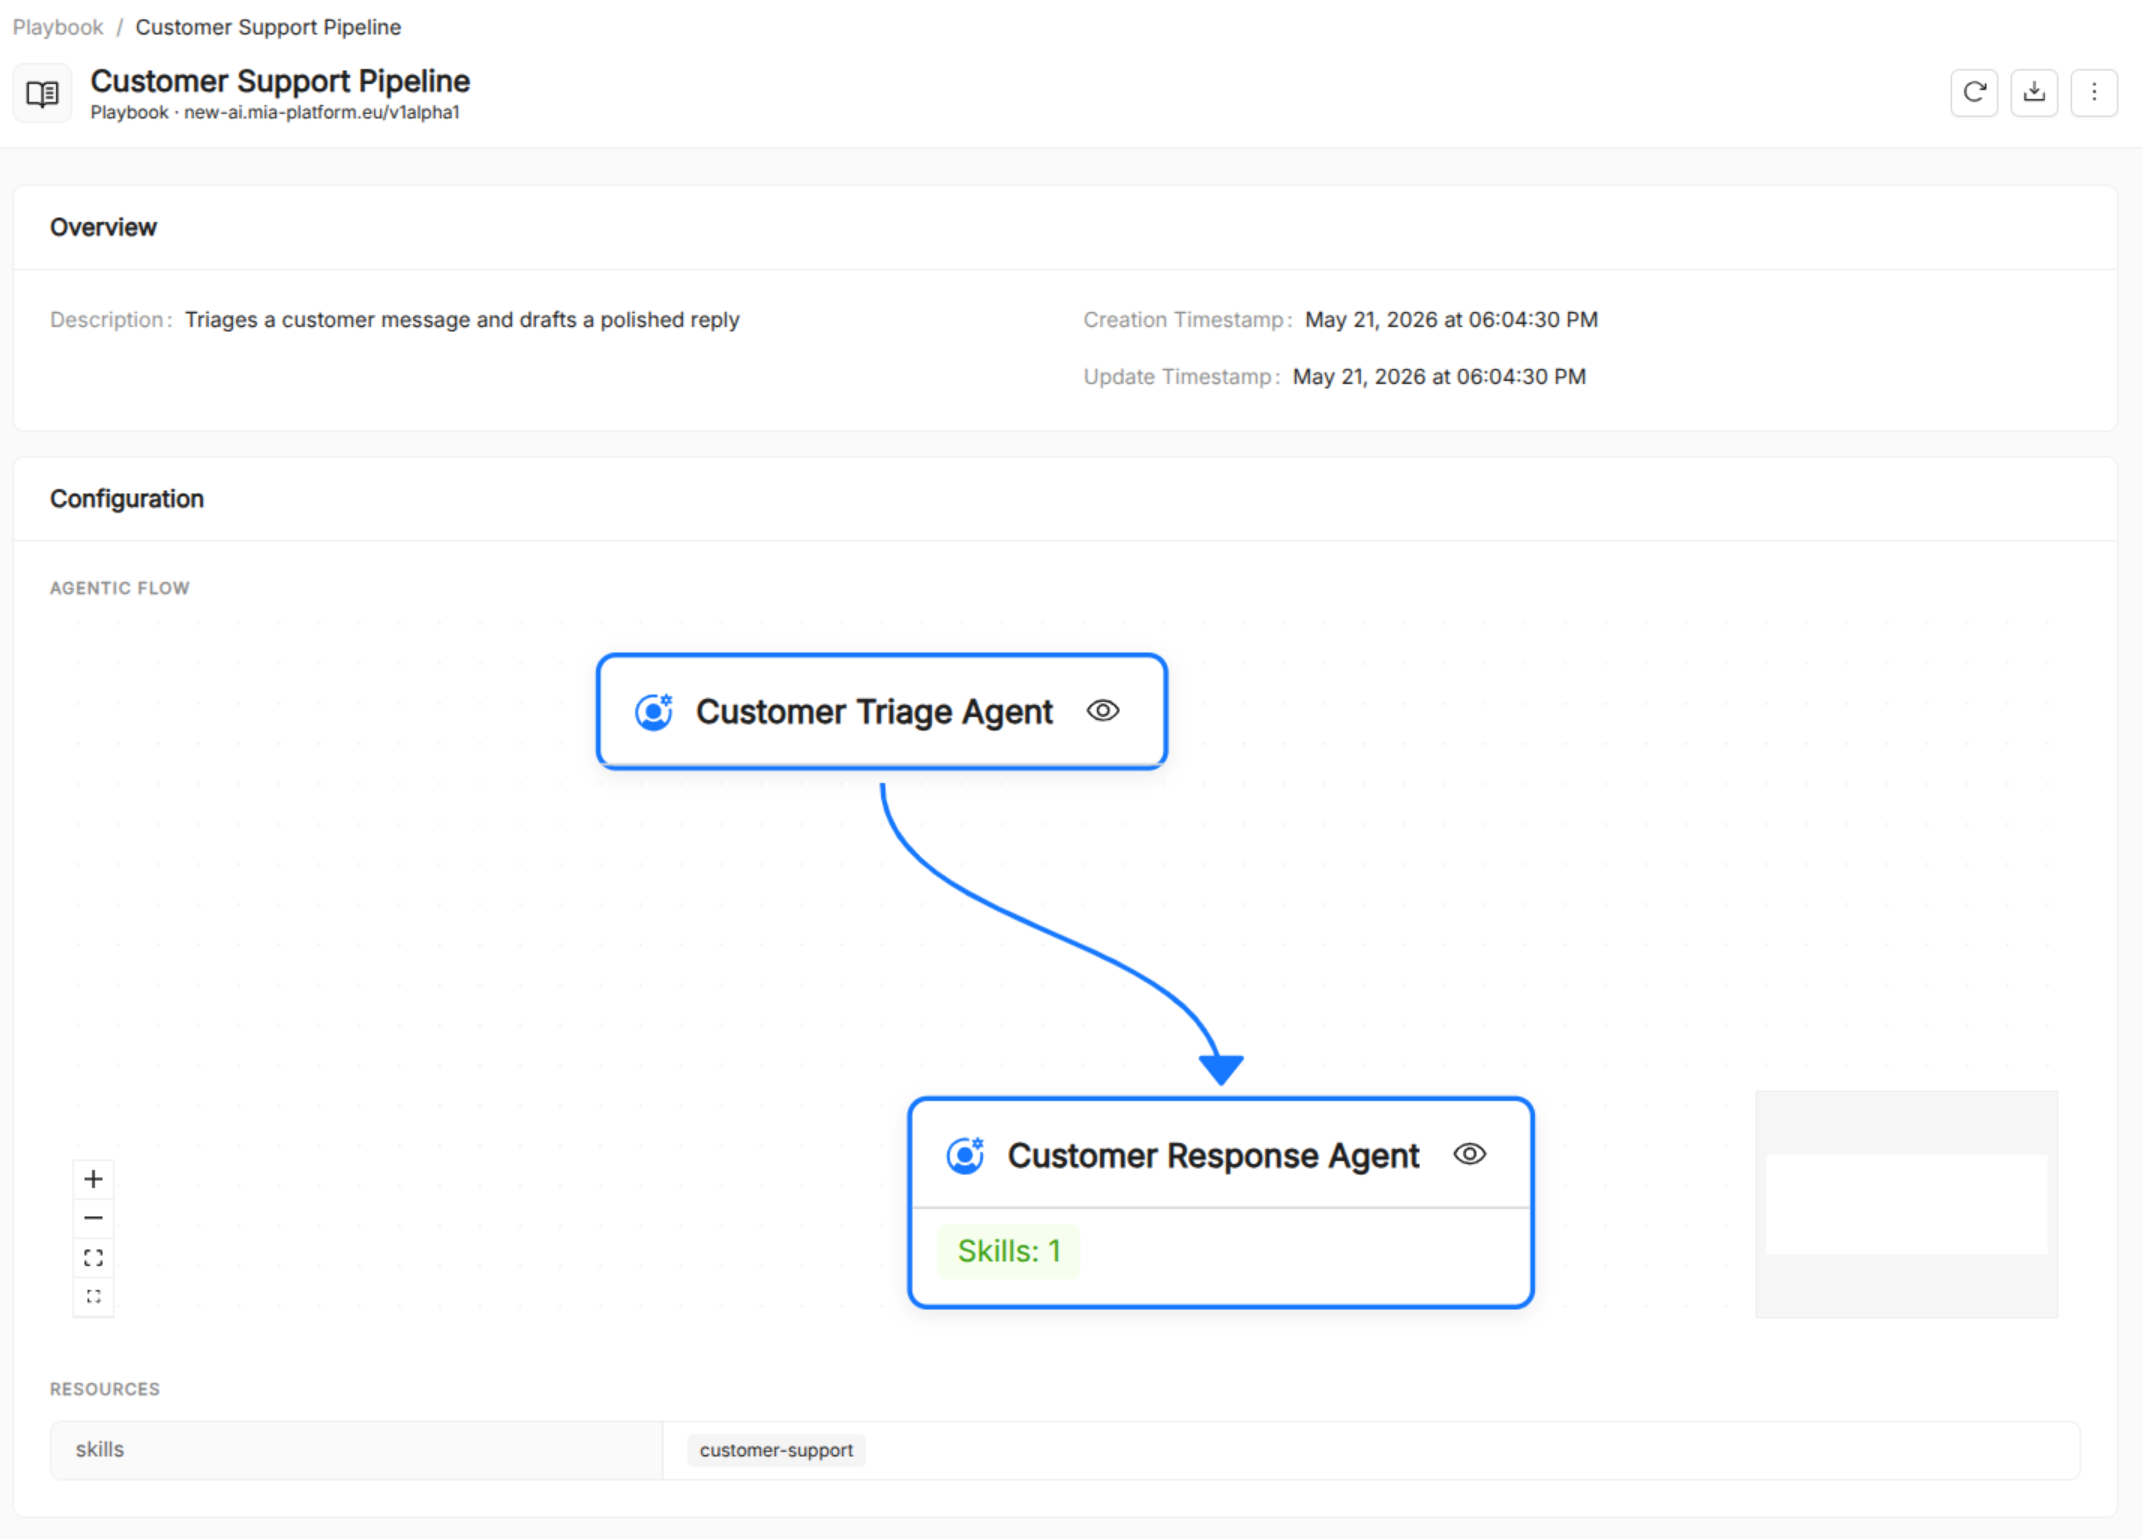
On the canvas:
- Drag the
Customer Triage Agentnode from the palette onto the canvas. - Drag the
Customer Response Agentnode below it. - Draw an edge from
Customer Triage AgenttoCustomer Response Agentto establish the sequential flow.
The canvas should now show two connected agent nodes.
- Drag the
-
Click Next to proceed to the Resources step.
-
Attach playbook-level resources:
- Skills: select
Customer Support - Spec Templates: select
Customer Reply Format
These resources are now available to all agents in the playbook.
- Skills: select
-
Click Create Playbook.
Your playbook is ready. It now appears in the Playbooks list.
Step 6: Test in the AI Playground
-
Go to
Playgroundin the left navigation. -
Select the Customer Support Pipeline playbook from the dropdown.
-
In the chat input, type a sample customer message:
Hi, I was charged twice for my subscription this month and I can't log in to check my invoice. Please help! -
Send the message and observe the streamed output:
- The Customer Triage Agent produces a JSON classification.
- The Customer Response Agent receives that classification and produces a formatted reply.
Summary
You have completed the full resource creation cycle in AI Foundry:
| Step | Resource created | Purpose |
|---|---|---|
| 1 | Model (Claude Haiku 4.5) | LLM provider configuration shared across agents |
| 2 | Skill (Customer Support) | Reusable tone-of-voice guidelines |
| 3 | Spec Template (Customer Reply Format) | Structured output format for replies |
| 4 | Agents (triage, response) | The two execution units of the pipeline |
| 5 | Playbook | Sequential orchestration of the two agents |
| 6 | AI Playground | Live validation of the end-to-end workflow |
Next steps
- Explore Prompts to extract the agent instructions into versioned, reusable templates.
- Add a parallel orchestration node to run independent agents concurrently.
- Register an MCP Server to give agents access to live data sources such as your ticketing system.